Friday, 12 July 2013

Antenna Bases - Clearing-Up Amateur Misinformation

I recently came across some interesting discussion threads online about the strength of concrete, especially in relation to erecting antenna towers.

The stressful - and expensive - part of antenna tower preparation.


There was an awful lot of nonsense and misunderstanding about.  An exchange in one thread, stated with the characteristic certainty of someone who doesn't have a clue, believed concrete was "as strong after three days as it will ever be."  The overall consensus in that debate was that after 28 days, concrete had reached full strength.

The above views are complete nonsense.

Concrete does not harden, as some think, because of drying out or 'setting' like some evaporative glue.  It hardens as a result of a series of chemical reactions that form an interlocking microscopic mesh of minerals, all based on calcium, that provide the mechanical strength.  If you aren't convinced, mix a small amount yourself and let it harden on a warm, sunny day.  A few days later, you will be able to crush it with your hands, it will be that weak - all because the essential water for crystal growth dried out.

Microscope image of mineral crystals developing in concrete.  The crystals need a considerable time - many years - to fully develop and reach maximum mechanical strength.


After three days, concrete will certainly have 'set', but the crystals that make up the strength have only just begun to grow.  After 28 days, which is a period chosen only for its real-world convenience and not any inherent feature of concrete, it will have reached about 70% of its ultimate strength.  Note that, in the case of very hot and very cold weather, the ultimate strength is greatly reduced.  That's why you should pour structural concrete during reasonable weather.

Reasonable warmth and a good dollop of time are prerequisites for strong concrete.


The full mechanical strength of concrete is never reached for many years.  Five years is about as early as you would want to make the "as strong as it will ever be" claim, though even then, it will still be adding strength for some years again.

So, whilst you may want to put up your tower as soon as that expensive concrete has 'set', don't!  Wait for a month, keep the concrete moist and covered for as long as you can, and then feel sure that the strength is up to scratch.

Saturday, 22 June 2013

Clevis-Type, Tilt-Over Mast

Continuing the never-ending search for reasonably priced equipment for amateur radio enthusiasts, I'd like to highlight an excellent, UK-made tilt-over mast, operated by winch.


Hand built clevis, tilt-over mast for £175?  Excellent!  (this is slightly modified from the standard mount)

If you're an antenna experimenter, or perhaps operate largely seasonal bands like 6m, then a mast that's easy to put and bring down is a really useful piece of kit.  Sadly, being ham radio, if you look at anything that will do this that's sold on the full commercial market, it will set you back several hundred pounds or more.

Enter a Scottish Saviour - Gary.  He hand-builds this excellent piece of kit, which allows you, if you need, to have slight modifications made at the time of manufacture.  You just slot your tube into the sleeve and off you go.  Hand rotating, sure, but hand rotating made easy.  Gary can even get the tube for you at a good price.

So there you go.  A mount that can handle fairly considerable head loads, especially when guyed.  It's also likely, in all but the worst cases of neighbour wars, to escape too much attention from the planning department - always a welcome benefit.

Indeed, you can fit a steel sleeve into concrete in the ground, and simply plonk your mount in and out as you wish.  Although the mount won't stay up for long without the sleeve, you may well be able to argue that the mount is held in place by its own weight, so is not attached to land, so is not development.

The price of the standard mount is currently (June 2013) £175.  Slight modifications will add about £40 to the price tag.  Delivery in both cases extra.  In reality, you'd be unlikely to save much money if you made it yourself.

UPDATE: July 2013

On looking in detail at the delivered product, all the above holds true but there were a few serious problems of design.

(1) A bar had been put in to support the pole at the bottom of the sleeve.  Unfortunately, probably just an error, the winching cable had a loop and collet fitted on the top side of the bar, meaning the support pole would rest on the cable, rendering it both a bit wonky and very likely to wear the cable away over time.  There was no real need for the bar - the pole can just rest or be supported above the sleeve with a collar.

(2)  The box section support post is much too short.  It should be at least about 2m above ground, even better at 3m.  Being short, the antenna pole will put an unnecessarily high load on the mount, and doesn't allow much headroom when the pole is folded over - very inconvenient in a garden used for other things.

These issues vary according to user, but in general, they are changes needed for most users.  A little bit more development and customer feedback, and it'll get there.  Ultimately, I decided to dismantle the sleeve and entirely redo the support so that it's longer and has a cable attached to the bottom of the support pole, not the sleeve, affording much greater leverage.


Monday, 17 June 2013

6m Contest - Excellent Operating!

This past weekend (15/16 June 2013) saw a 6m contest.  I'm not 100% sure which it was, as I'm not a contester, but it would appear to have been the SMIRK contest.

6m.  Where good operating takes refuge.

Conditions weren't very good, at least on the 15th.  I found myself bizarrely keeping up with very well-equipped stations, even though I was operating a homebrew 2 element quad and 100W!

What was noteworthy was the excellent, actually exemplary operating conduct during this contest.  Every report and serial number properly read back and nobody accepting a partial copy.  Also absent was the usual shouting, now entrenched behaviour on other bands.

So, as well as being the Magic Band, 6m seems to be the refuge for all good operators.

Well done!

Thursday, 13 June 2013

Join the RSGB for a £1 - and a lot of hassle!

Join the RSGB for £1!

What a brilliant idea!  Sure to get the punters rolling in in their thousands.

Pounds roll in other directions if you mess things up...

Or will it?

I had a friend who wasn't a member.  I thought I'd lavish a whole Queen's quid on him.

I filled in all the details and...it didn't like the web browser unless it was MS Explorer.  Strange, that, because most hams will be independent sorts and will use Firefox or, as I do, SeaMonkey.

OK.  Let's appeal for help and click on the 'send us an email' feature.  Guess what?  It doesn't work.

Apparently, the RSGB web site was hacked as the promotion went live, so they decided to present the backup rather than have nothing at all.  OK, happens to the best of us, but such incidents are predictable, and ought to be part of any web site management plan.

So, a good idea seems to have gotten off to a bad start.  I'm sure I'll make the effort to call them on the blower tomorrow.  Even if the web site hadn't been hacked, the donation to the RCF thing is outdated, gleefully informing us it funds GB4FUN - which the RSGB has already scrapped!

Nice one, RSGB!

Tuesday, 28 May 2013

Egg Poacher Fishing Pole Device

Yes folks, today's great, cheap device is a ring of silicone made out of an egg poacher!


Commonly available in all supermarkets for very little money, cutting bands of silicone out of these makes for very good anti-slip and anti-crush rings for placing beneath jubilee clips to secure each section of a fibreglass fishing pole.
Cut a ring of silicone for a nice anti-slip, anti-crush ring for fibreglass poles.


You can alternatively buy special jubilee clips from Spider Beam, which are fairly reasonably priced and hence qualify for inclusion on the blog!

Oh, and if you want a good source of very high quality hand-operated butterfly type jubilee clips, you can buy as many or as little as you want from this fine store in the UK.  After several months of high winds and salt-laden air, I can't see any hint yet of rust.  Other standard clips turn to dust unless coated with grease.


Thursday, 16 May 2013

6m, 50MHz 'Magic Band' Livens Up!

I noted a few days ago that 6m sporadic E was livening up, and now it's a near-daily occurrence (mid May).

Regular readers may recall I tried to build a convoluted loop for 15m some time ago, which initially was a disappointment but on re-examination, worked just fine.  It wasn't an antenna that I was using much, though, so recycling time was around again!

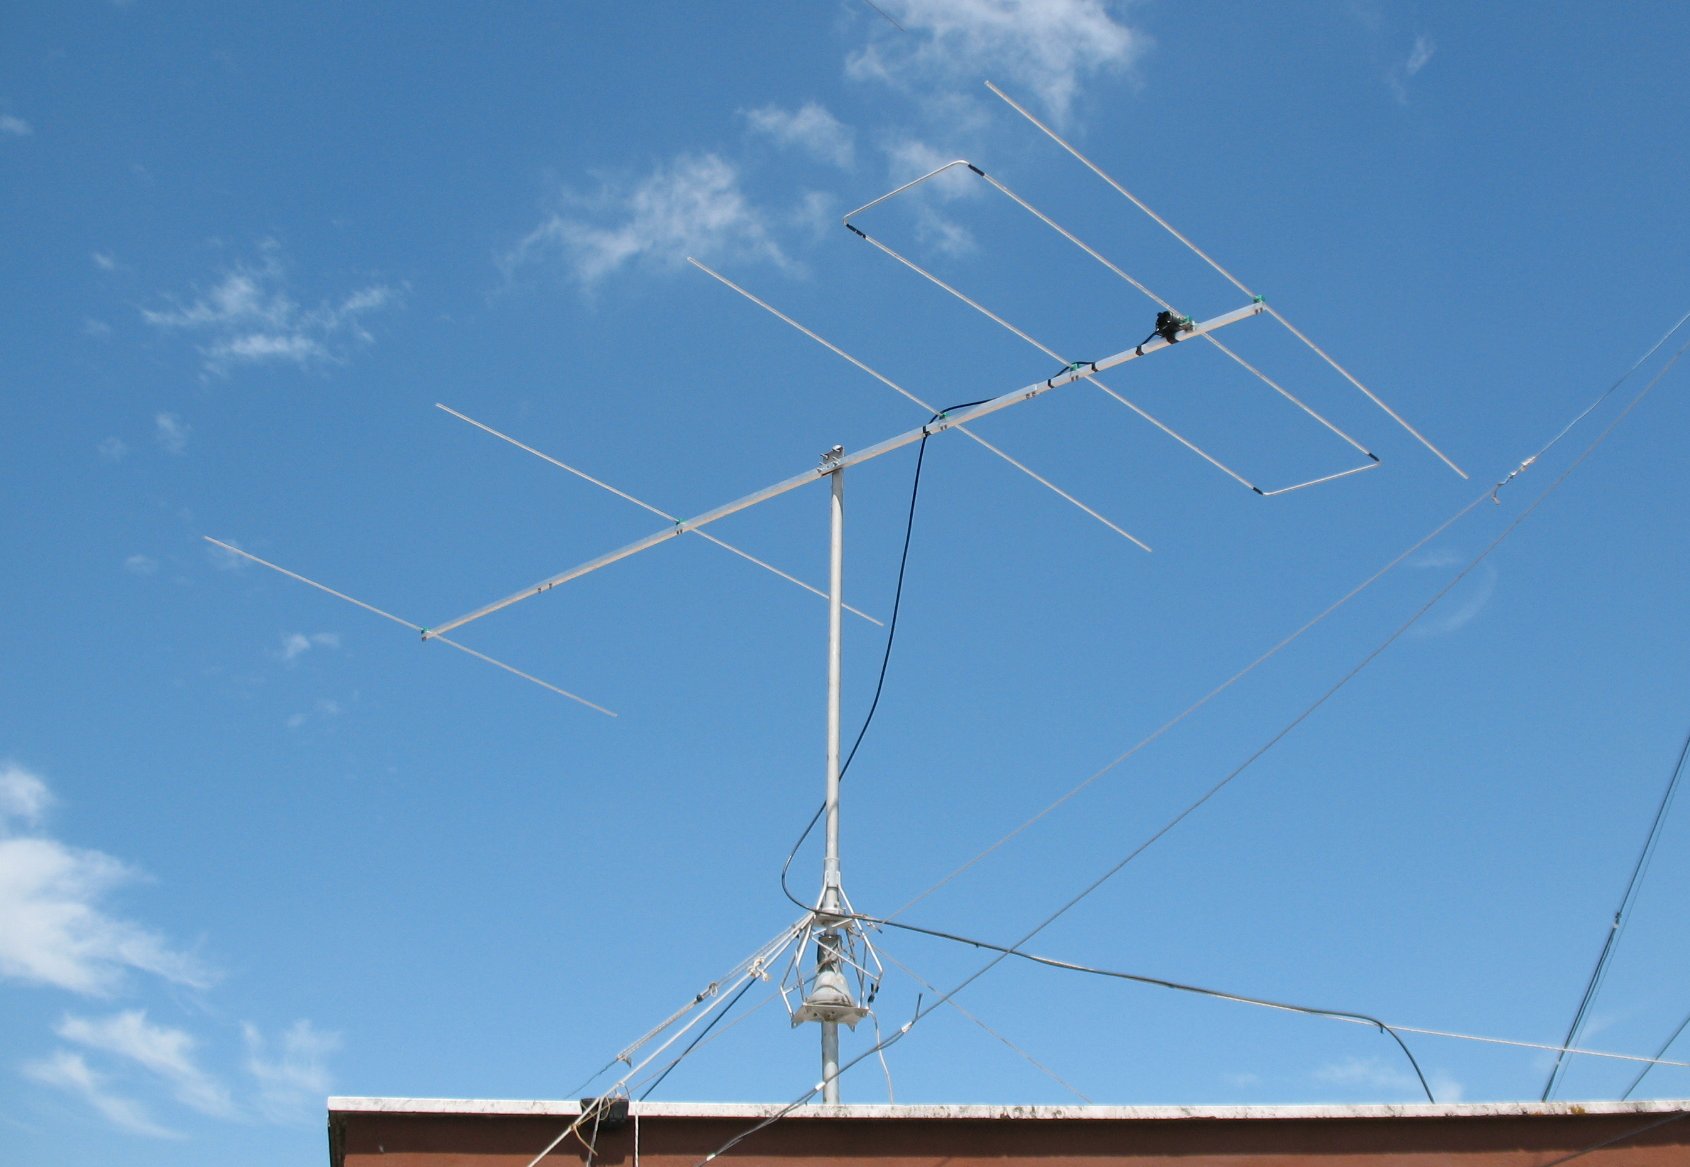
So I had the support structure made of the old 15m beam PVC lying around (as you can see from the algae in the photo!)  I decided these were ideal to run a full wave loop for the 6m band, approximating a circle and so having a greater capture area than any other shape.  I threw together a reflector to make a 2-element beam yielding perhaps as much as 7dBi gain.  The spreader elements are hooked up to the boom using cable ties, as it's a purely seasonal antenna, for me at least, so can be pulled apart very easily later.  I melted holes using 3/4" copper tube in a blowtorch, and then glued PVC support cross arms to which the main elements are attached.

Runs beautifully at 1:1.2 SWR.  All-PVC construction, including the 36"-long boom.  This was spare material; I recommend you use fibreglass spreaders for your antenna, as PVC deteriorates in sunlight.

I later found the PVC, having lain outdoors for nearly two years, had become brittle and prone to breakage; the tee and elbow bends are particularly badly affected.  I've since remade the antenna with an aluminium tube boom and metal brackets (exhaust clamp and 90 degree aluminium type) supporting light fibreglass spreaders - the bottom sections of 3m poles are ideally sized and of the right strength for this quad.

That's much better!  Fibreglass spreaders and exhaust clamp/angled aluminium supports on an aluminium boom.  It catches very little wind and so is extremely robust.


I referred to this fine site, and by keeping to the measurements for the two element version (plus the 'extra ' bits for trimming) indicated there, I found I had an SWR of 1:1.2 without any cutting or adding at all.  How often does that happen?  Connection is via a quarter-wave stub (allow for the velocity factor, assumed to be 0.66 here) and then to normal 50-ohm coax; again, the stub measurement is correct on the site link above.  A ferrite or air-wound balun is needed (air wound is fine in most cases).

The image below is detail of the bracket and aluminium spreader supports.  It's easy to do, but positioning the bracket is a bit of a brain scrambler in that you have to incorporate an offset due to the fact the 90 degree aluminium passes on the outside of the boom, not though it.  You can only realise and deal with this fully in the flesh.  When I was done, I drilled a single hole to join the two supports at the centre with a single stainless bolt and nylock nut, making the whole thing more stable.  You can use good quality cable ties or jubilee (hose) clips to secure the fibreglass arms; I prefer cable ties for their ease and lack of rust!


UPDATE ON PERFORMANCE.

In the few days since making this beam, I've worked all over Europe and into Iceland on 6m sporadic E using no more than 100W SSB and some 25W PSK-31.  I am very happy indeed with the antenna, not least because it cost me virtually nothing!  Please don't make your antenna out of PVC because it, and especially the connecting bits, becomes surprisingly brittle after a while outdoors.

A year on, and having lain on the ground over the wettest winter on record, I've just reinstalled the beam for the 2014 Es season.  I replaced the junk RG58U with RG213 (don't forget enough coax to make 4-5 turns for a choke balun!), and connected-up.  Result?  The SWR had gone to 1:1.5, but that was only because I had a wire 6m beam nearby.  Pulling that and a 2m antenna down restored a 1:1 SWR and it's currently WSPRing as I write. 

Here's the SWR and impedance plot as taken by a SARK-110 analyser 3 years later.

The stub is made of about 40 inches of RG6 75Ohm 0.66 velocity factor satellite coax; you can cut it to the right length using analyser - the impedance of an open-ended piece of coax drops to zero at the 1/4 wave length.

Perfect matching across the whole 6m band.


Here's the quad full-face into 50mph gusts.  Rides them with ease:

6m Quad in 50mph Gusts from John Rowlands on Vimeo.


Sunday, 12 May 2013

Volta RTTY Contest

This weekend it's RTTY contesting, Volta style.

Whilst there is, strictly, nothing 'wrong' with operating RTTY at the band locations now full of canary whistling, there also doesn't appear to much of an effort going on to be considerate to others.

I've had enough of seeing this rubbish on frequencies already in use.

RTTY operators often seem to just start transmitting without checking if anyone else is using the frequency.  If the frequency is being used already by another mode that doesn't sound like RTTY - say, WSPR stations - then it is ignored and transmission begins all over the top.

I think the organisers of the Volta contest ought to quickly address conduct on the air (on which it currently seems to make no reference) because it is not casting themselves in a good light at all.  There is more to life than getting as many points as possible.  Respecting others already using a frequency - even if it is another mode and you are desperate for those points - is a basic law for any respectable RTTY or indeed other mode user.